IO signal switch triggers camera timing FTP upload for capturing photos - Distribution cabinet monitoring
As a professional provider of IoT data acquisition solutions and an expert in industrial IoT data acquisition, the editor of Shanghai Data Acquisition IOT Technology Co., Ltd, (daq-iot) hereby presents the following introduction, and sincerely welcomes discussions and exchanges. Supported Communication Interfaces: CAN, RS485, Mbus, 4–20mA, Profibus, CC-Link, HART, digital I/O, etc. Industrial Protocols: Modbus RTU/TCP, HJ212, IEC104, DLT645, DLMS, IEC61850, MQTT, etc. Mail:export@daq-iot.com
1 Product Overview
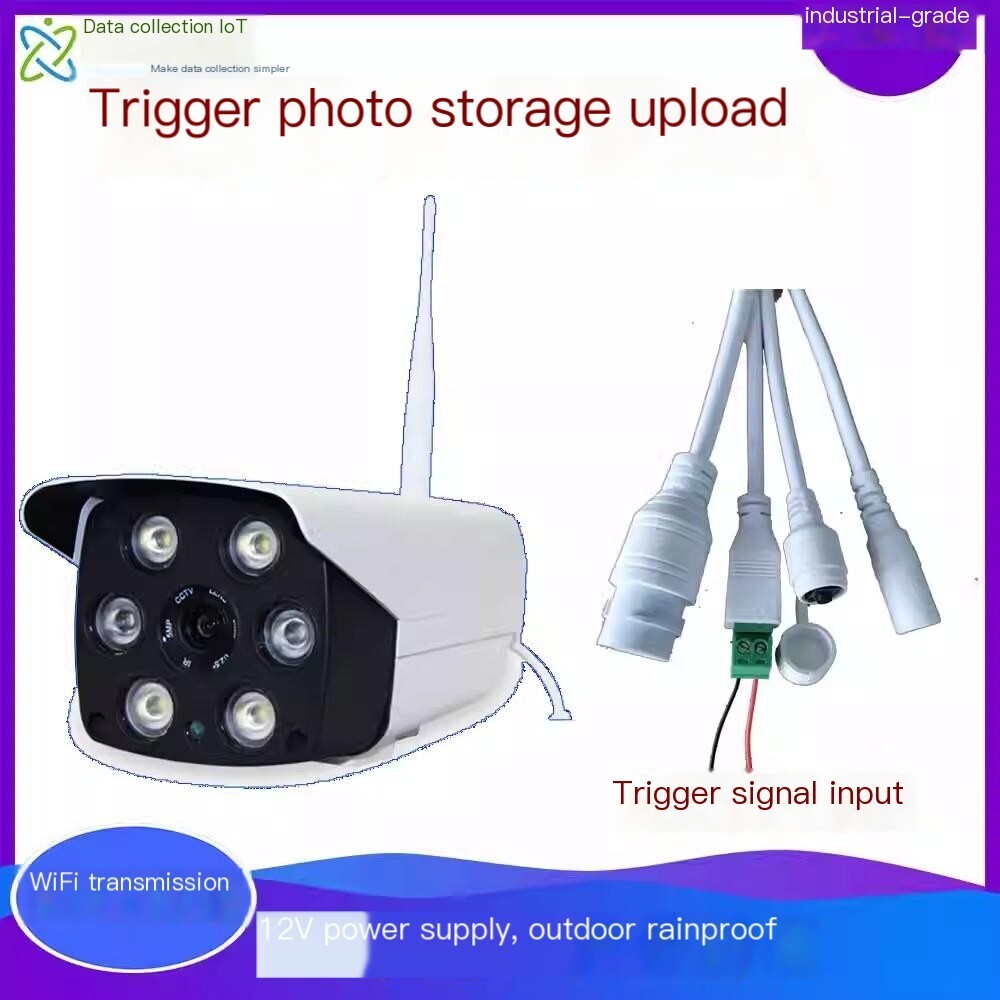
SC-GP-CAMIO isShanghai DAQ-IoTNetwork Technology Co., LtdA wireless switch signal relay based on 4G or WiFi has been launched to trigger timed photography/video capture, FTP email upload of photos, and a camera camera. Supports timed capture of images and event capture of images, which can be widely used for the recognition and recognition of instrument readings, as well as for capturing photos and video surveillance in the fields of crops, cultural relics, geotechnical engineering, hydrology and water conservancy.
This product supports WiFi or Ethernet access to the network, takes regular photos and uploads them to * * *'s FTP server or stores them on an SD card. cooperate, coordinate, collaborate4G wireless network cardCan be used in outdoor scenarios without WiFi network.
2 Service Philosophy
Our Zhengzhou company promises:
You are not only purchasing products, but also receiving meticulous and thoughtful technical support services.
We provide free remote guidance, remote configuration and debugging services, and send data to the client's server.
Free consultation service forIoTsolution!
3 Product characteristic parameters
3.1 Camera parameters and selection
Pixel: 2 million, 3 million, 5 million optional, default 2 million
Lens: 2.8mm/4mm/6mm
| Lens specifications | 2.8mm | 4mm | 6mm |
| Monitoring angle | 90 degrees | 80 degrees | 70 degrees |
| Monitoring distance | 0~5m | 0~10m | 6~20m |
Memory card function: Supports
Power supply: 12V DC
Weight: 0.35kg
3.2 Electrical Characteristics
Power supply mode: 12V DC or battery power supply
(Power interface: DC5.5 * 2.1mm female socket, positive inside and negative outside)
3.3 Communication characteristics
Default networking methods: Ethernet/WiFi, 4G
Image upload: FTP server
3.4 structural characteristics
Antenna type: Rubber stick external antenna
Material: PC plastic (shell)
Main protection level:IP65
Size: 185mm × 85mm × 80mm
3.5 working environment
Environmental temperature -30 ° C to 70 ° C, humidity 0 to 95% (non condensing)
4 Component matching
| Supporting 12V lithium battery pack |
Camera bottom fixed bracket
5 Core advantages of the product
u Easy installation, quick deployment, helping the IoT project to land quickly
u compact size
u Rainproof design, suitable for outdoor environments
u Comes with fill light, suitable for night photography
u Support remote configuration of parameters
6 Scheduled photo upload settings
You can set any time and interval to capture photos and store them on an SD card or upload them to an FTP server.
Set the interval for timed photography
FTP parameter settings
Example of Image Upload Results
7 WiFi camera configuration
7.1 Connect the computer and enter the configuration interface.
Connect the camera to the power supply and use a network cable to connect to the computer.
Open the link/download/ocx/Active.exe to download and install the browser control.
Check the IP address on the camera label, which defaults to 192.168.1.10 (the actual one on the camera label shall prevail).
Set the computer IP to match the cameraSame network segment (e.g. setting the computer IP to 192.168.1.211)Enter the camera IP in the browser, press enter to enter the login interface, enter the username (admin) and password (default is empty) (actual subject to the camera tag) to log in to the configuration interface.
7.2 Trigger photo configuration.
Click on the main menuClient configurationEnable external alarms.
Click on the main menu Device Configuration - Settings - System Settings - Network Services, double-click FTP to set FTP parameters
On the alarm input interface, set the parameters according to the following figure.
7.3 WiFi settings
Mobile phone installationMonitoring Eye AppSelect Add Device and WiFi Configuration.
App download link:
8 Application Cases
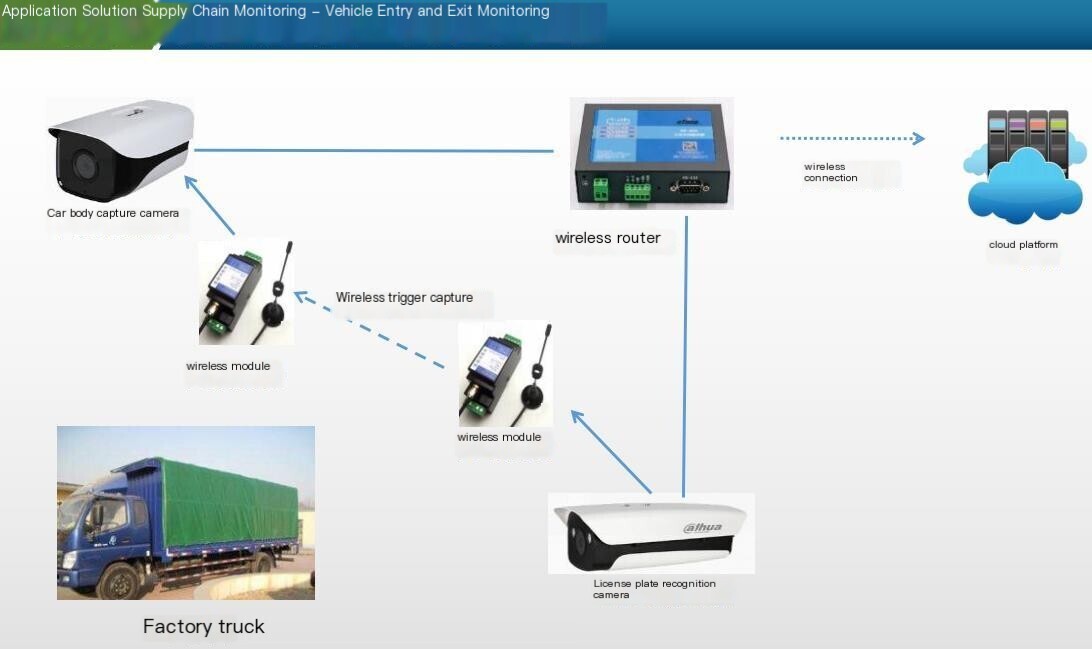
Factory entry and exit vehicle monitoring
1 Product Overview
SC-GP-CAMIO is a camera launched byShanghai DAQ-IoTTechnology Co., Ltd., which is based on 4G or WiFi wireless switch signal relay triggering timed photography/video capture FTP email photo upload camera. It can be widely used for the recognition of instrument readings, photo capture and video monitoring of crops, cultural relics, geotechnical, hydrological and water conservancy fields.
This product supports WiFi or Ethernet access to the network, takes regular photos, and uploads them to a designated FTP server or stores them on an SD card. Combined with 4G wireless network card, it can be used in outdoor scenarios without WiFi network.
2 Service Philosophy
Our company solemnly promises:
You are not only purchasing products, but also receiving meticulous and thoughtful technical support services.
We provide free remote guidance, remote configuration and debugging services, and send data to the server specified by the customer.
Free consultation service forIoTsolution!
3 Product characteristic parameters
3.1 Camera parameters and selection
Pixel: 2 million, 3 million, 5 million optional, default 2 million
Lens: 2.8mm/4mm/6mm
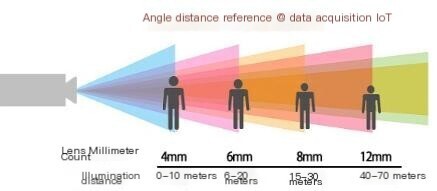
| Lens specifications | 2.8mm | 4mm | 6mm |
| Monitoring angle | 90 degrees | 80 degrees | 70 degrees |
| Monitoring distance | 0~5m | 0~10m | 6~20m |
Memory card function: Supports
Power supply: 12V DC
Weight: 0.35kg
3.2 Electrical Characteristics
Power supply mode: 12V DC or battery power supply
(Power interface: DC5.5 * 2.1mm female socket, positive inside and negative outside)
3.3 Communication characteristics
Default networking methods: Ethernet/WiFi, 4G
Image upload: FTP server
3.4 structural characteristics
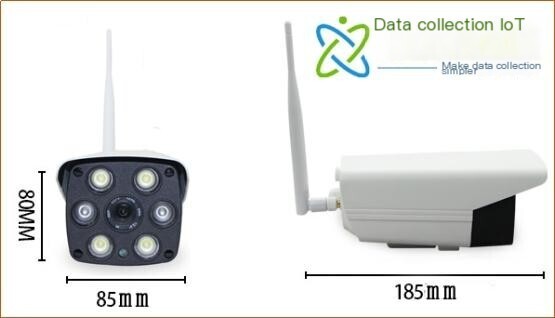
Antenna type: Rubber stick external antenna
Material: PC plastic (shell)
Main protection level: IP65
Size: 185mm × 85mm × 80mm
3.5 working environment
Environmental temperature -30 ° C to 70 ° C, humidity 0 to 95% (non condensing)
4 Component matching
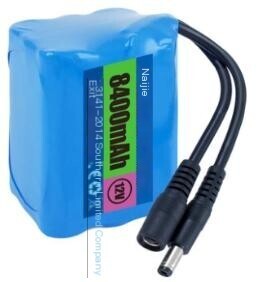
| Supporting 12V lithium battery pack |
| Supporting 12V lithium battery pack |
| Supporting 12V lithium battery pack |
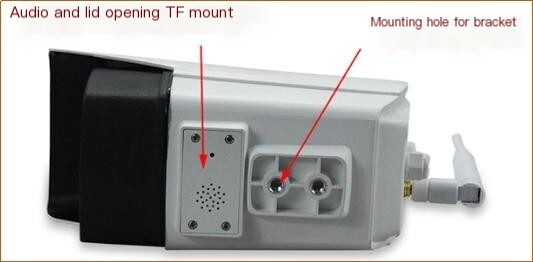
Camera bottom fixed bracket
5 Core advantages of the product
u Easy installation, quick deployment, helping the IoT project to land quickly
u compact size
u Rainproof design, suitable for outdoor environments
u Comes with fill light, suitable for night photography
u Support remote configuration of parameters
6 Scheduled photo upload settings
You can set any time and interval to capture photos and store them on an SD card or upload them to an FTP server.
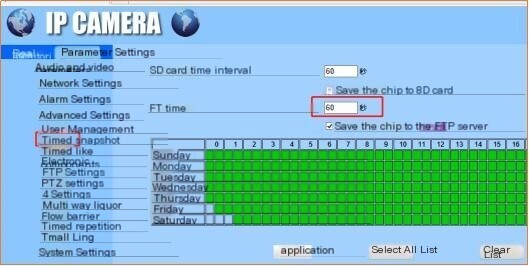
Set the interval for timed photography
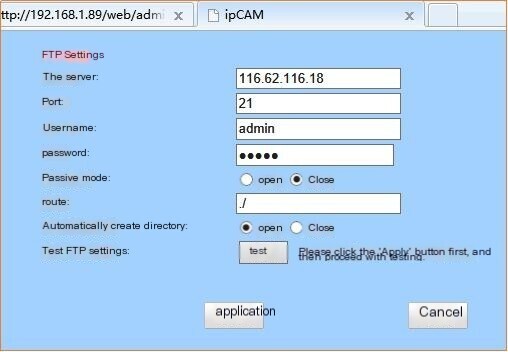
FTP parameter settings
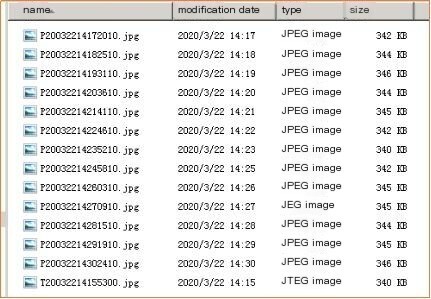
Example of Image Upload Results
7 WiFi camera configuration
7.1 connect to the computer
Connect the camera to the power supply and use a network cable to connect to the computer.
Check the IP address on the camera label, which defaults to 192.168.1.88 (the actual one on the camera label shall prevail).
Set the computer IP to match the cameraSame subnetEnter the camera IP in the browser, press enter to enter the login interface
The default username and password are both admin (actual subject to the label on the camera).
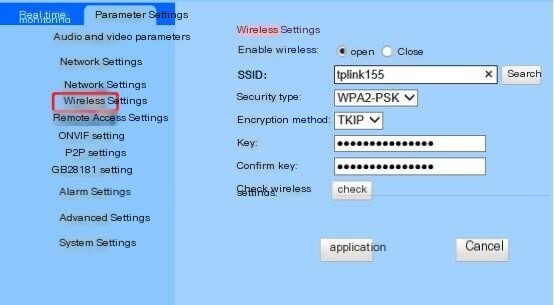
7.2 WiFi settings


评论
发表评论